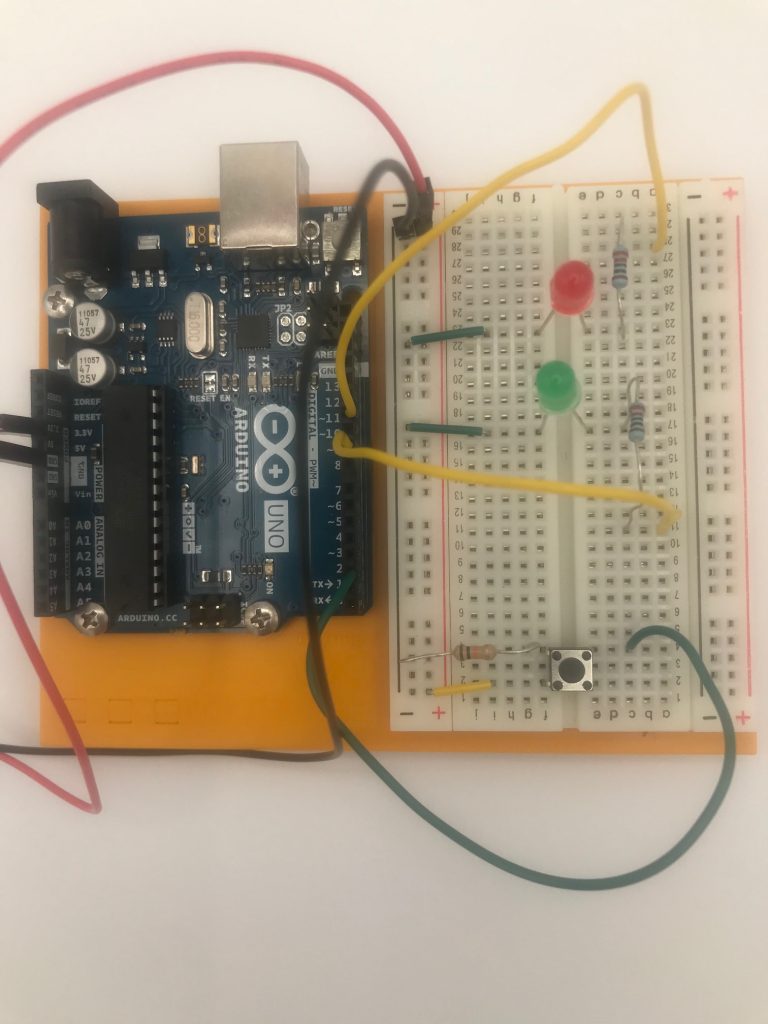
Setting up interrupt functions on Arduino is quite simple. Search the internet, you’ll find several nice tutorials on the subject. I’m just sharing my own example for style, and to clarify, why do interrupts at all?
Interrupts are immediate, and they allow clean separation of concerns between main (loop) code and special-purpose functions. Like object-oriented programming, they clarify code intent.
The main loop() function typically has delays built in, so while you could test for a button push in the loop, it may take a while before the loop gets to that point in the code, so you’ll see a delay between the push the resulting effect. An interrupt does what it says – it interrupts the main loop and executes all the code in the interrupt function first, before returning back to the main loop.
Setting up an interrupt is super easy: just define a function, then “attach” it as an interrupt with the attachInterrupt() function, with a digitalPinToInterrupt() identifying the appropriate pin (on Arduino Duo and Nano, digital pins 2 and 3 are available for interrupts), and the type of interrupt, RISING, FALLING, or CHANGE. For simple button interrupts, RISING is your best choice. If your interrupt function references any global variables, make sure those variables are defined as volatile.
For this demo, I have set up a simple circuit with two LEDs, red and green, and a button. Typical set up: grounded LEDs with 220 ohm resistors in serial on the anode pin; button is grounded with a 10 kiloohm resistor and its common pin to digital pin 2, with power on the other switch pin.

The program is simple: a green light that blink endlessly. The button push interrupts that loop to turn on the red light. Push it again (it’s a toggle) to turn off the red light. If the red light is on, green remains off.
To those new to C programming, let me explain a few more lines. First, the ternary operator: (toggle == HIGH) ? LOW : HIGH . This says if toggle value is HIGH, then return LOW, else return high, all in a single line of code. Since toggle itself is being assigned (toggle = ) to this operator’s return result, toggle is just becoming the opposite value of whatever it was last. The ternary operator is concise, and saves you a long if then else statement with lots of curly braces.
This line digitalRead(red) == HIGH , also saves you a tedious if then else statement. If digitalRead() is HIGH, it returns true, else it returns false.
byte red = 11;
byte green = 9 ;
byte interrupt_pin = 2 ;
volatile int toggle = LOW ;
void setup() {
  pinMode(red,OUTPUT) ;
  pinMode(green,OUTPUT) ;
  pinMode(interrupt_pin,INPUT) ;
  digitalWrite(green,LOW) ;
  attachInterrupt(digitalPinToInterrupt(interrupt_pin),toggleRed,RISING);

}

void loop() {
  blinkGreen() ;
}

void blinkGreen() {
  if (!isRed()) {
    digitalWrite(green,HIGH) ;
  }
  delay(2000) ;
  digitalWrite(green,LOW) ;
  delay(2000) ;
}

void toggleRed() {
   toggle = (toggle == HIGH) ? LOW : HIGH ;
   digitalWrite(red,toggle) ;
   if (isRed()) {
    digitalWrite(green,LOW) ;
   }
}

boolean isRed() {
  return digitalRead(red) == HIGH ;
}